Examination of blood smears is an integral part of haematological testing. Blood smears are useful for examining cell morphology and identifying blood-borne parasites. Remember to include a detailed history and description of lesions on the DAFWA Diagnostic Laboratory Services (DDLS) submission form.
For more information on blood smears, contact DDLS on +61 0(8) 9368 3351.
See the links on this page or email DDLS@agric.wa.gov.au for laminated copies of other diagnostic reference guides A visual guide to a ruminant animal post-mortem, Basic diagnostic sampling protocol – livestock, Brain removal techniques and A visual guide to a chicken necropsy.
Perform blood smears when you suspect:
- blood-borne protozoal or mycoplasmal conditions
- haemolytic conditions
- anaemia
- haematologic neoplasia.
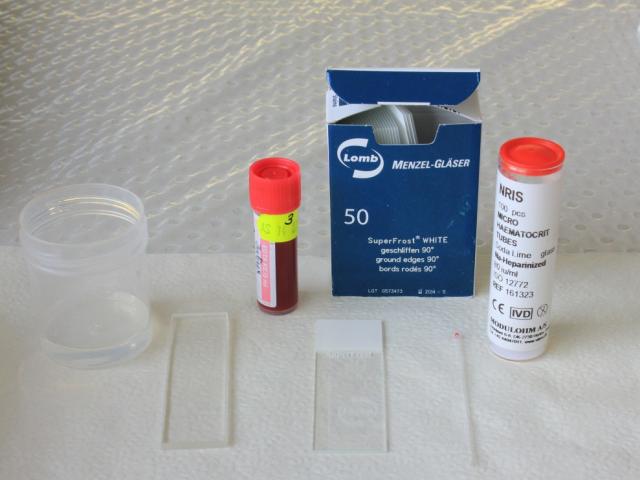
Equipment required for performing blood smears:
- microscope slides with frosted ends for writing on
- spreader slide – use a specific spreader slide with bevelled edges, or a second clean microscope slide
- capillary (microhaematocrit) tubes
- pencil to label the slides
- blood collected in an EDTA tube
- pot of sterile water to clean the spreader slide between uses.
Top tips for making good smears:
Making great blood films takes practice; don’t be discouraged by less than perfect smears. Submit all blood smears, perfect or otherwise, as areas of the film may be suitable for examination.
- Collect blood in an EDTA tube and make the smears when back at the clinic.
- Use clean, high-quality microscope slides.
- Aim for a blood droplet size of 4mm diameter.
- Optimise spreading speed for length and a good feathered edge.
- Hold the spreader slide at 30-40 degrees to achieve optimal smear length.
- Maintain even contact throughout the spreading motion.
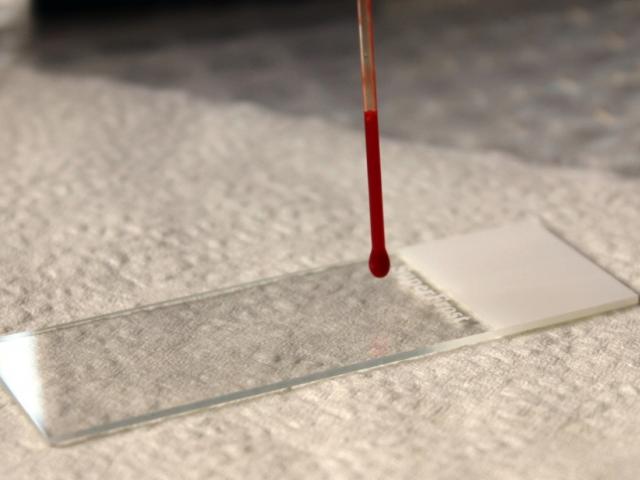
Step 1
- Fill a capillary tube three-quarters full with blood.
- Hold the capillary tube vertically over the slide.
- Allow 1 drop of blood to form on the end of the tube.
Step 2
- Place the tube onto the slide about 0.5cm from the frosted area.
- Leave a drop of blood about 4mm in diameter on the slide.
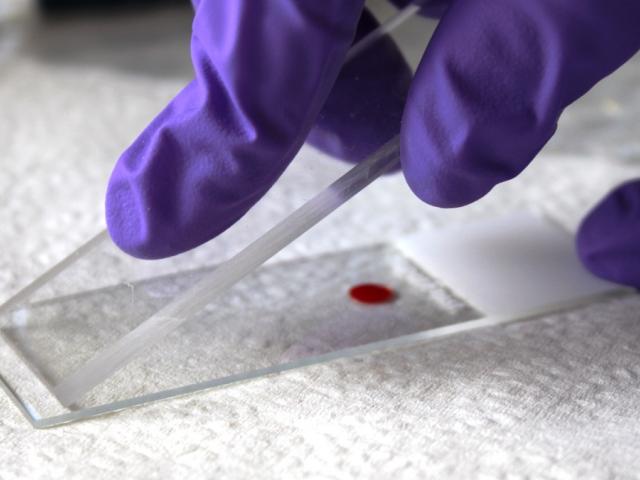
Step 3
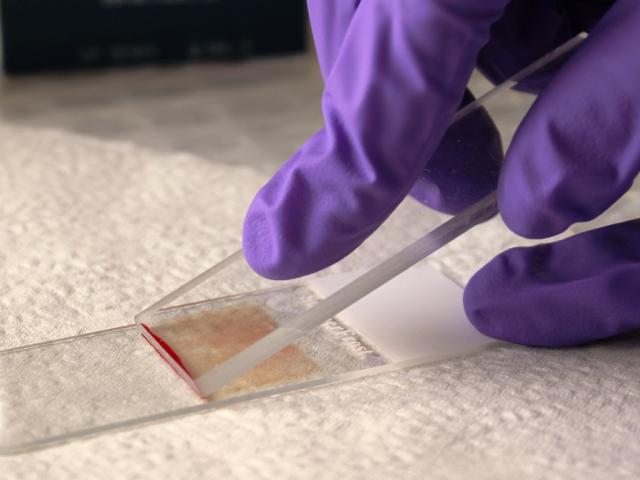
- Hold the spreader slide or second microscope slide at a 30-40 degree angle at the end of the slide (i.e. in front of the blood droplet).
- Ensure the short edge of the spreader slide is in even contact with the lower slide.
- Pin the lower slide to prevent it from moving.
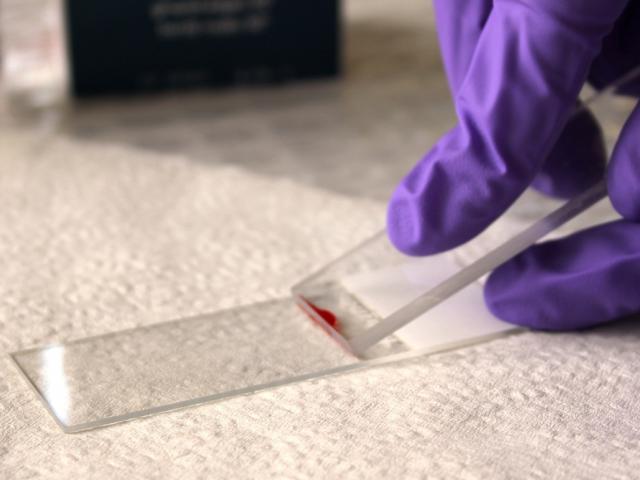
Step 4
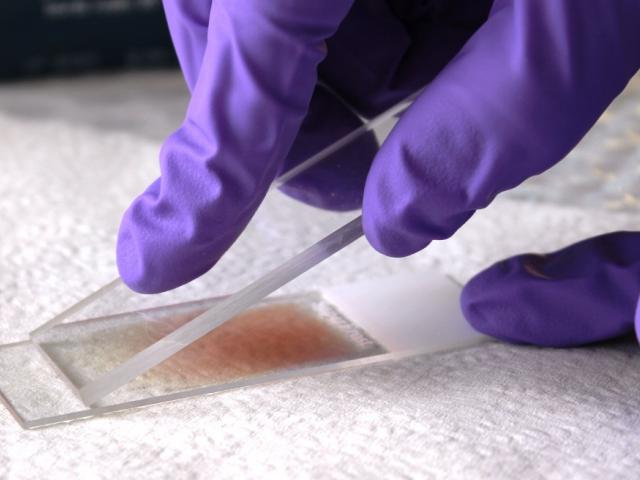
- Using a smooth motion, draw the spreader slide back through the entire drop of blood.
- Allow the blood to spread evenly along the edge of the spreader slide.
Step 5
- Push the spreader slide forward along the length of the lower slide.
Step 6
- Maintain a constant smooth motion, angle and even contact.
- Note: blood is being dragged behind the spreader slide, not in front of the slide.
Step 7
- An optimal smear is three-quarters the length of the slide and has a feathered edge.
- Leave the slide to air dry and make more smears if required.
- Pack smears individually into slide holders.
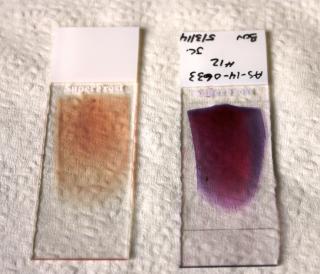
Unstained (left) versus stained smears
Do not fix or stain the smears. The DAFWA Diagnostic Laboratory Services (DDLS) will do this under controlled conditions to optimise the staining process.
Troubleshooting blood smear errors
| Problem | Solutions |
|---|---|
| Short smear |
|
| Long smear/no feathered edge |
|
| Thick smear |
|
| Thin smear |
|
| Smear has waves and ridges |
|
Blood smears - common errors
The blood droplet on the left is too big and will result in a thicker smear. The blood droplet on the right is the preferred size.
Smear technique - left to right:
- slide 1 - perfect smear
- slide 2 - smear technique interrupted in middle
- slide 3 - smear was skewed
- slide 4 - blood droplet too thick
- slide 5 - smear too short.
Infectious diseases in Australia diagnosed by blood smear
| Disease | Species | Transmission | Disease status |
|---|---|---|---|
| Anaplasmosis | cattle | tick-borne | endemic-northern Australia |
| Babesiosis | cattle | tick-borne | endemic-northern Australia |
| Mycoplasma ovis (eperythrozoonosis) | sheep | iatrogenic, blood-sucking insects (midges, mosquitoes, flies) | endemic |
| Bovine anaemia due to Theileria orientalis group (BATOG) | cattle | tick-borne | endemic in eastern Australia - first diagnosed in WA in 2013 |
Bovine erythrocytes infected with protozoal parasites from the Theileria orientalis group. The parasite is known as a piroplasm when it is within an erythrocyte. Piroplasms appear in erythrocytes from day 10 post-infection. Naïve, young, pregnant or immunecompromised animals may develop severe anaemia and mortalities can be as high as 30% in a herd.
Ticks are vectors for many protozoal and mycoplasmal parasites. For Theileria spp., transmission in the tick is known to be transstadial or life stage-to-life stage. A larva or nymph stage tick transmits the parasite to the next animal it feeds on. Trans-ovarial transmission (transmission from infected females to their larvae) does not occur. Control of ticks and good sanitation when using needles and surgical equipment minimises the introduction of these infectious parasites into naïve populations.

